Welcome to WordPress. This is your first post. Edit or delete it, then start writing!
Cherry Blossom at Brindley Place (Ikon Gallery)

You know spring is here when you see Snowdrops and Daffodils popping out from the ground everywhere. These are amazingly beautiful flowers. However, the real highlight of spring in term of flower photography is cherry blossom. For me, photographing cherry blossom goes hand in hand with bluebells as the “must do” for spring.
Unfortunately due to Covid restriction, going out just to photograph cherry blossom is classified as non essential travel for the right reason and therefore not allowed. The good news is that outdoor exercise like cycling is allowed. Going out cycling with my twin boys along Birmingham canals has become one of my favourite regular activities since last September. As some might know, Birmingham has more canals than Venice. That means I can go to a lot of places on the bike along the canals. One of the places I can get to is Brindley Place at the west side of City of Birmingham.
At Brindley Place, there is a little square in front of an art gallery called Ikon Gallery. This is a little beautiful place hidden within the jungle of tall buildings. In this square, there are two rows of cherry trees which display beautiful cherry blossom every year in Spring. So there you go, with my camera in my backpack, I cycled there with the boys on a nice sunny day. We took a break at Brindley Place, had some snacks, then they started playing with the water and stone features while I started taking some photos.


I am pretty sure these are not the best photos I can get out of this place but this was the best I could do in what I called opportunistic photography, with one eye on the kids.
I would sure come back to this place again in more normal time, with my tripods and at different time of the day for better light.
Making Big Print
I still remember when I first started photography, all my photos were in prints. Maybe I am old, but I feel that looking at prints is very different from looking at a phone or computer screen. In fact, the switch from film to digital has eroded my interest in photography so much that I didn’t do any photography for a few years.
Nowadays we all got used to looking at our photos on a screen. However, a lot of photographers like myself feel that we should print our photos more. I guess one of the limiting factors is cost. Printing is not cheap, especially if you want to make a bigger print.
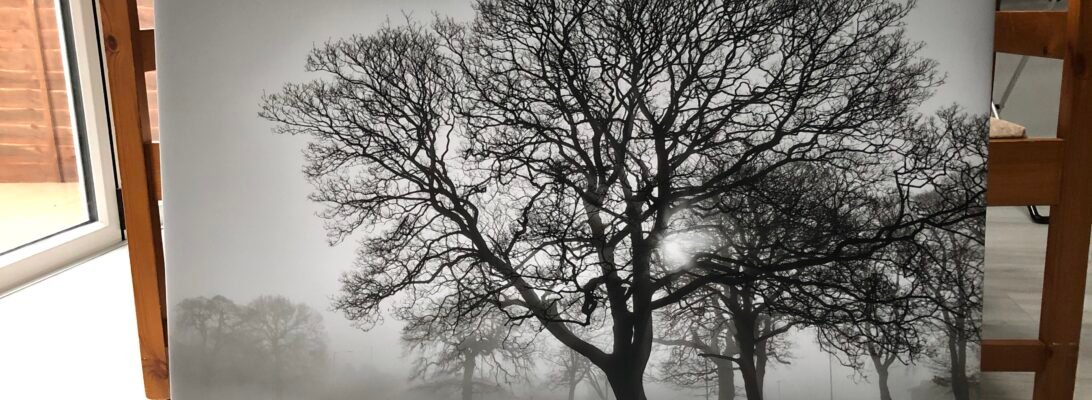
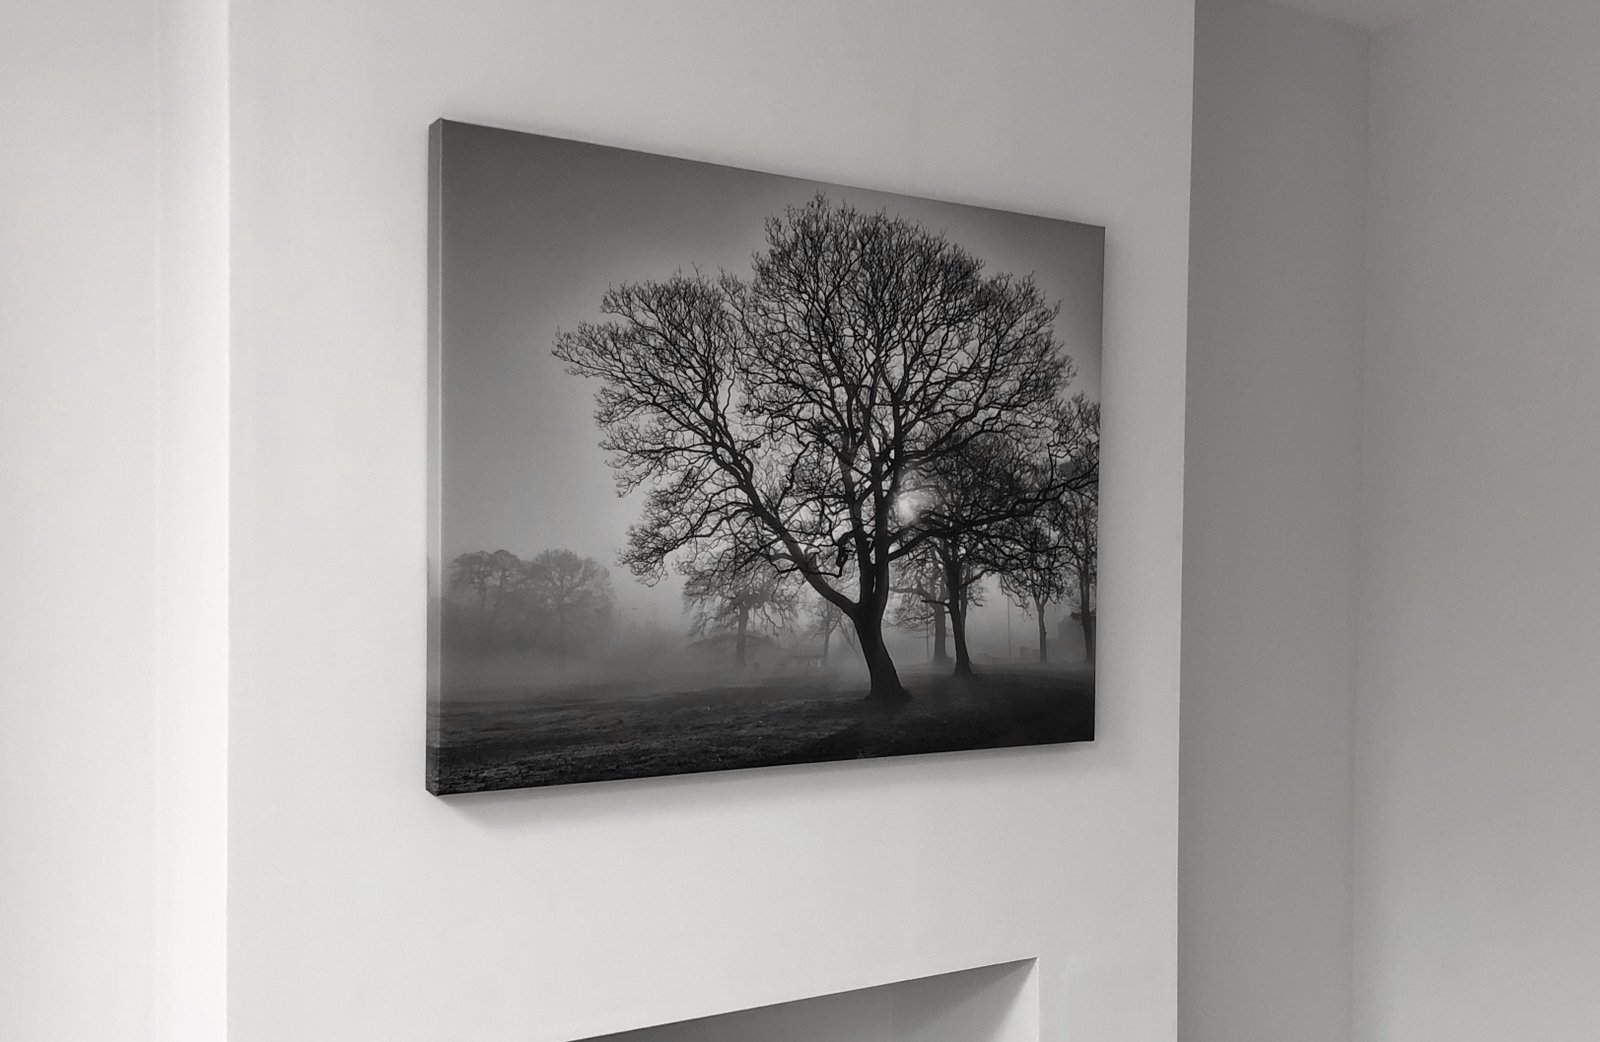
Recently, we moved into a house where there was a TV on a wall with pre-installed cables. We decided not to have a TV in our house, but the sight of hanging cables is not very inviting. I came up with an idea of covering it up with a large canvas print. The reason for canvas is that I will have space behind the frame to hide the cable.
After looking through all my photos, I found this one I like. It was taken on a misty one morning on the way to work. Here is the original photo.
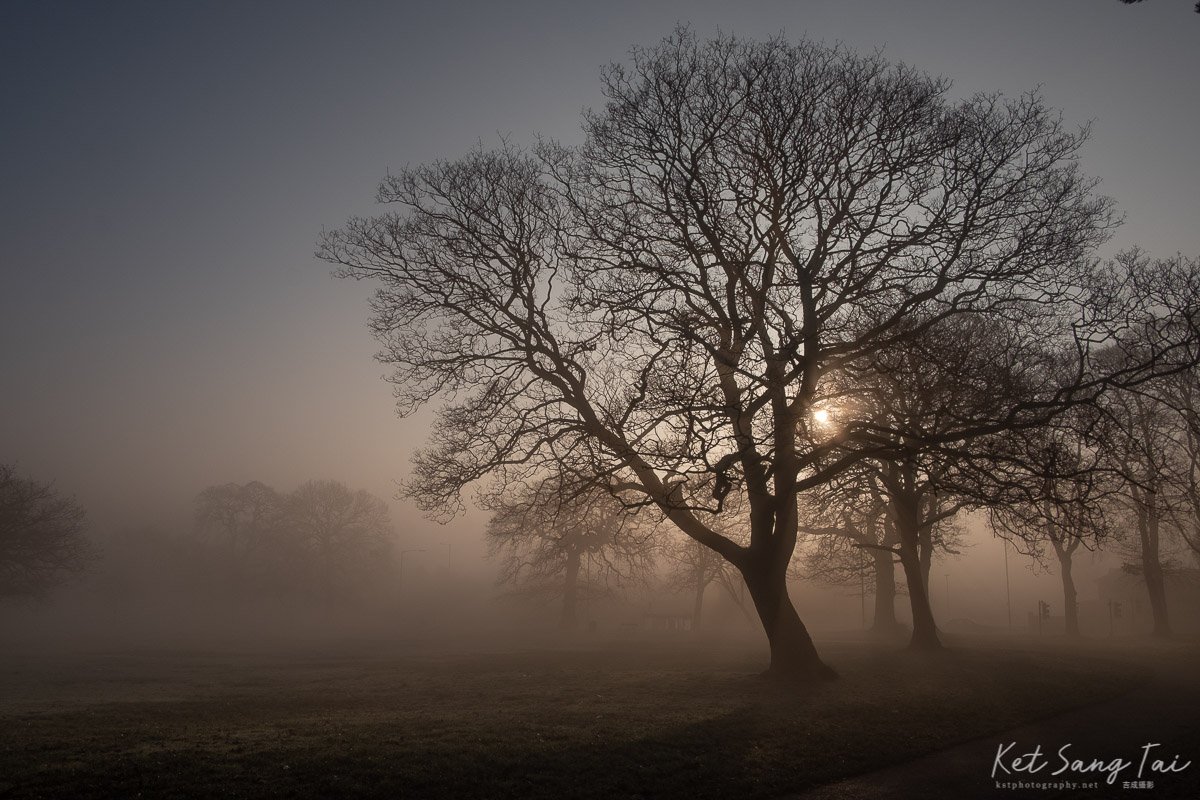
I quite like the colour, but my wife and I both agreed that we should have a black and white wall art. So I spent sometimes converting it to black and white using Silver Efex Pro and a bit of cropping. I found a great Christmas offer which allowed me to make big 40 x 30 inches print at a very reasonable price.
After three weeks wait, I finally got it delivered this week. I was delighted with the quality. This photo was taken with a Fujifilm X-T20 and the humble XF18/2 and it is definitely good enough to this print size.

Now I have it on my wall and I no longer have to look at those untidy cables coming off the wall.
Every time I make a print, I feel very happy and satisfied. I should definitely print my photos more.
Food, food, food…….
Being a Malaysian who came to UK 16 years ago and having a wife who came from Taiwan at around the same time means making trip to Malaysia and Taiwan has become our yearly event. It used to be just two of us but now we have two little boys to bring along. Bringing two young kids on 14 hours long haul flight one way plus many internal flights and train is no easy task. Despite that, I always bring my favourite camera with me to capture as much of the good memory as I can.
One of the highlights of the trip (the other highlight is of course time spent with family and friends) is the fantastic Taiwanese and Malaysian food. Naturally that become one of my favourite photography subjects for the trip.


On the trip this July, I brought my EOS R with the new RF35mm macro with me. This became a formidable combo. 35mm is great for general photography and environmental portrait of the kids. The half life size macro feature is also great for food photography. I also brought the the RF24-105mm which sat in my camera bag most of the time.
Here are few pictures of the fantastic food I had during the trip. I do some lots more which I haven’t got the time to edit.


3 Lenses Which Made Me Buy The EOS R
It is always my view that we shouldn’t choose a camera based on the specification sheet or which one has the latest bells and whistles. Having the best camera doesn’t make us a better photographer. Although I have to admit that if you are already an excellent photographer, there is nothing wrong with wanting the best and latest equipment. For the majority of people who are learning the skill and art of photography, it is better to choose a camera based on 2 factors, ie personal need, and lens selection.
Today I want to give you my personal reasons why I have chosen the EOS R as my main camera because of its lens selection. I used to shoot with a Canon DSLR. 5 years ago, I switched to Fujifilm for its smaller size. Later on, I couldn’t resist the lure of 42mpx sensor and ended up with a Sony camera. Very soon I found out that I don’t need 42mpx files and it was slowing down my post-processing and clogging up my hard drives. I could have downgraded to a 24mpx Sony camera but I decided to get the EOS R because of the following 3 lenses available on the Canon system.
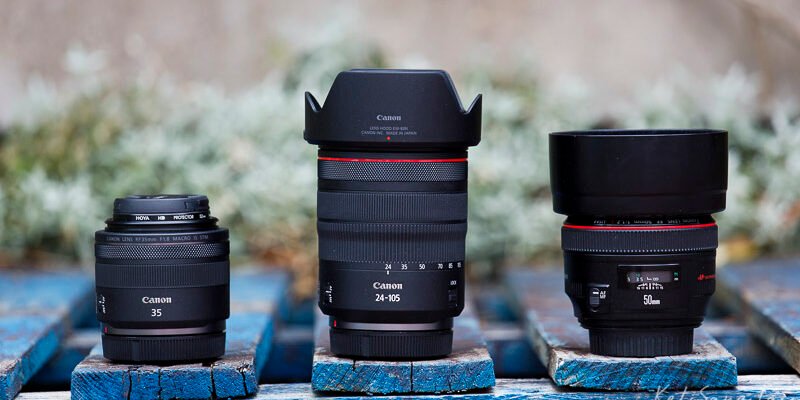
RF 24-105mm f/4 IS
I want this lens as an all-round travelling and personal lens to cover everything from landscape to portrait. This is one of the best all-round zoom available in the market, regardless of brand and system. Fujifilm’s XF18-55mm is affordable, small and of excellent optical quality and I really enjoy using it. However, for me, 28mm equivalent is not wide enough for landscape. 82.5mm equivalent with f/4 aperture on APS-C sensor does not give me enough background blur for portrait. It is also not weather resistant. Fujifilm’s XF 16-55mm f2.8 can give me the 24mm focal length and being f2.8 at 82.5mm equivalent is not bad. However, there is no image stabilization in both the lens and most Fujifilm camera bodies. I could have used it on the X-H1 which has IBIS, but this combo will be similar in size and weight to the EOS R and RF 24-105mm with a smaller sensor and shorter at the long end. Sony’s FE 24-105mm is almost as good as the Canon counterpart but it doesn’t come as part of a kit which means it is a lot more expensive to buy. All in all, EOS R coupled with RF 24-105mm seems to be the perfect combo for every day all-round shooting.
Pictures below just show how versatile this lens is.


RF 35mm f1.8 Macro
On the days when I want to keep everything light and simple, I like to just have one camera with one prime lens. I have always been looking for a small prime lens with wide enough aperture and good close focusing capability. Fujifilm’s 23mm and 35mm f1.4 give you excellent bokeh of f2 full-frame equivalent, but close focusing capability is far from impressive. The f2 version can focus closer but on APS-C body, f2 is not good enough for low light shooting and for blurring out the background, for me at least.
In the Sony world, I have enjoyed using the 35mm f2.8 (I used the Samyang one, not Zeiss) and FE 50mm f2.8 macro. I loved the 35mm for its small size but it doesn’t focus very close and f2.8 for a prime is a bit slow. I loved the 50mm because it is a 1:1 macro. It is very handy to have a walk around prime lens which is also a macro lens. Again, f2.8 just doesn’t cut it for a prime, especially in low light situation and for portrait.
When Canon first announced the RF 35mm macro, I was so excited. Finally, someone is making a lens which is exactly what I need. 35mm is a very versatile and useful focal length as a walkaround prime lens. The f1.8 is probably the largest aperture possible without making the lens big and heavy. It is bright enough for low light situation and provides good enough blurred background. With regards to macro, how I wish it has 1:1 magnification. But 1:2 good enough for most day to day photography, better than all primes except dedicated macro lens. It has IS, which is great as currently, Canon has no In Body Image Stabilisation (IBIS) yet.

EF 50mm f1.2
What else can I say with this legend of a lens?

35mm and 50mm are my two favorite focal lengths. I have tried many 85mm lenses in the past but somehow, I just don’t like it as portrait lens. I like to include more surrounding in the portrait photos. As far as I know, this is the largest aperture autofocus 50mm lens in the market. The only other autofocus lens with a larger aperture is Canon’s own EF 50mm f1.0 which has been discontinued. One of the reasons I wanted full-frame camera is for the background blur and this is as good as it can get. The new RF 50mm f1.2 is a better lens but it also costs a lot more. It is on my wishlist for the future.
There you go, here are the 3 lenses which made me buy the EOS R. If I have to add a fourth one onto this list, it will probably be the EF 70-200mm f/4 IS. This lens is almost perfect optically and costs a lot less than the latest EF 70-200mm f/4 IS II, Sony FE 70-200mm f/4 and the equivalent Fujifilm XF50-140mm f/2.8.
At the end of the day, it matters less than what people think. We live in a golden era where there are a lot of excellent and affordable equipments to choose from. So it doesn’t matter what gear you use, make the most out of it to create stunning images and push the boundary of creativity.
Centenary Square Birmingham 2019

A few years ago, Birmingham City Council decided that the famous and popular Centenary Square needed a revamp. The project started in 2017 with some controversy, not least the chopping down of Birmingham’s oldest tree.
Since then, the square which is one of the main attractions of Birmingham has been out of action, replaced by endless chaos caused by construction.
Fast forward to 2019, the square is finally reopenned!
I didn’t find that out through the news or anything. What happened was my twitter feed was full of pictures of the new square tweeted by my fellow photographers. You guess what happened next? How can I resist?
So I woke up very early one morning. I figured out there will be less people walking around in the early hour of the morning before the rush hour. However, what I didn’t realise was that one of the main features of the square, ie the foundation wasn’t turned on that early! Anyway, I was able to take some photos which I thought was fine but not great. I am sure I will be back there again taking more pictures.


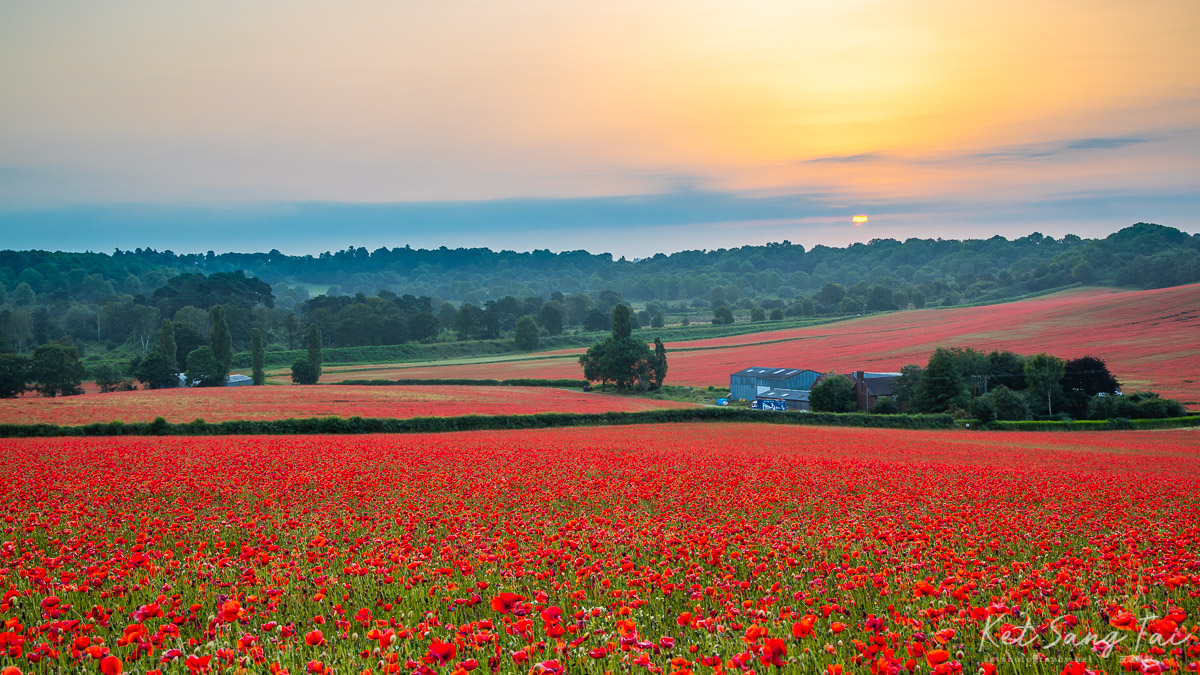
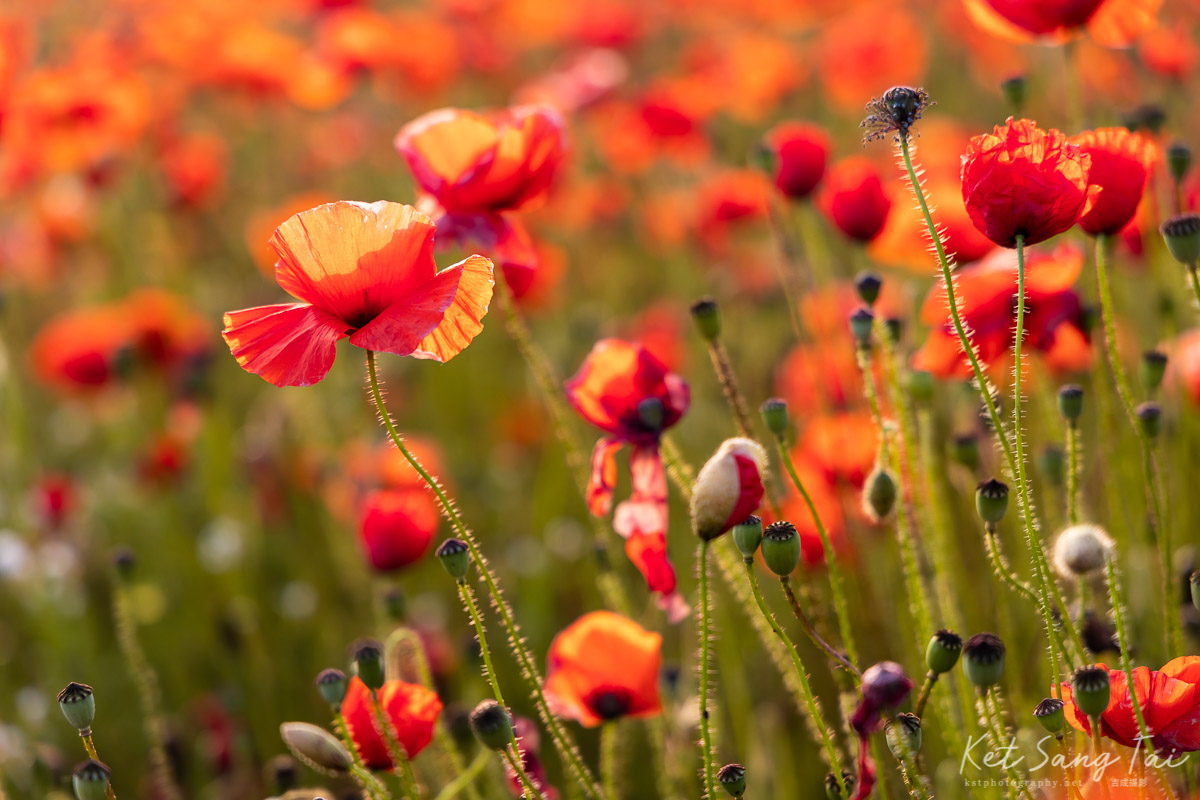
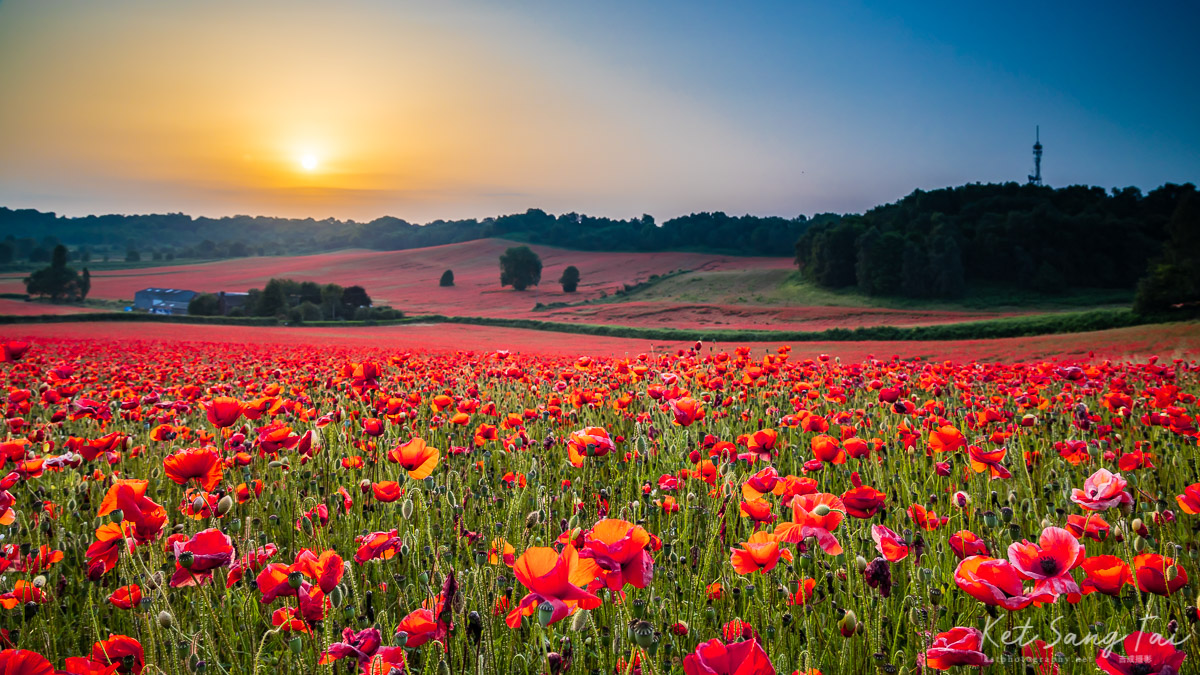
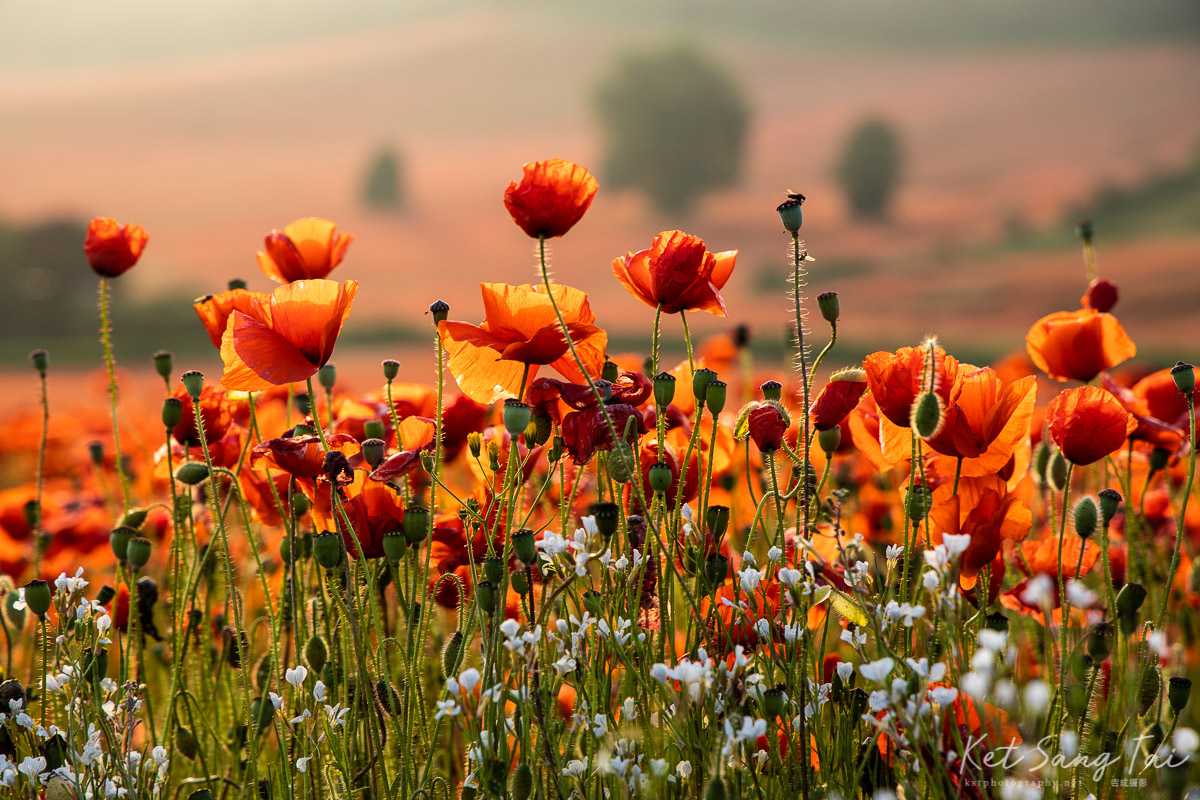
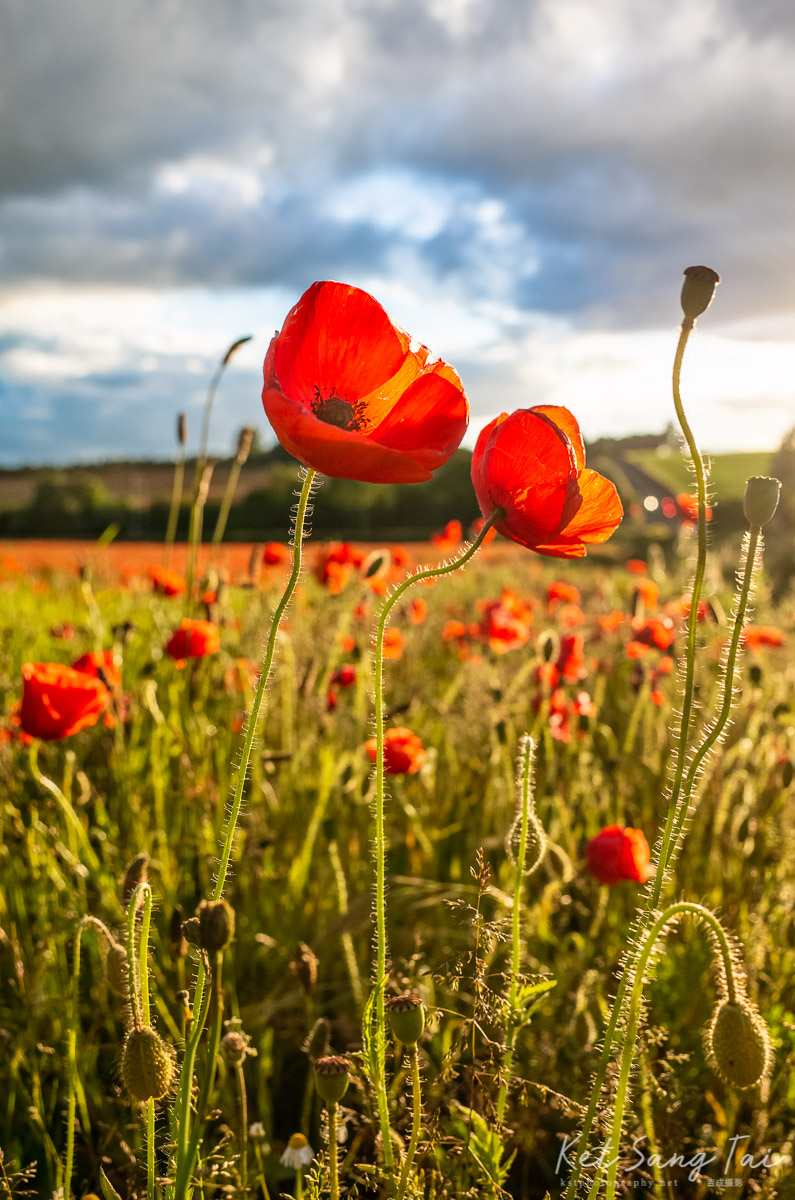
Brewdley Poppies Field 2019
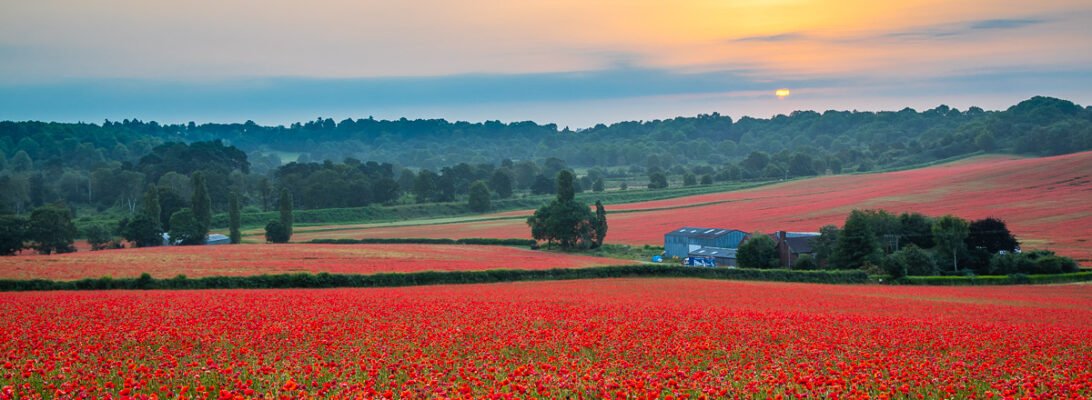
A few weeks ago, I went to a poppy field near Kidderminster and took some photos which I thought were quite good. I was pretty satisfied and wasn’t planning to go search for one anymore.
Since then, I had been seeing countless of poppy photos popping up on my twitter feed. These are mostly from local photographers and all were taken from the same place! It is the famous Brewdley poppy field, the place I failed to find in my last outing!
Learnt my lesson, I asked for specific location from a fellow photographer Chris Fletcher on Twitter and went there the day before I was planning to go photographing it. On arrival, I met another photographer who was going to the same place. It was a bit of a walk from the parking site and I was ever so grateful that I met this photographer. Otherwise I would have never found it.
And then the next morning at 330am, I reluctantly got out of bed, had my very early morning coffee and headed to the field. It took me 35 minute to get to the car park and further 15 minutes walk to the field. It was still dark when I arrived at the car park. To my delight, there was another photographer who has just parked his car and was heading to the same place! Again, I followed him on the dark woodland path to this amazing poppy field. What I saw afterward was nothing short of spectacular.
I spent around 2 hours there and it was such a great experience. Here are a selection of photos.


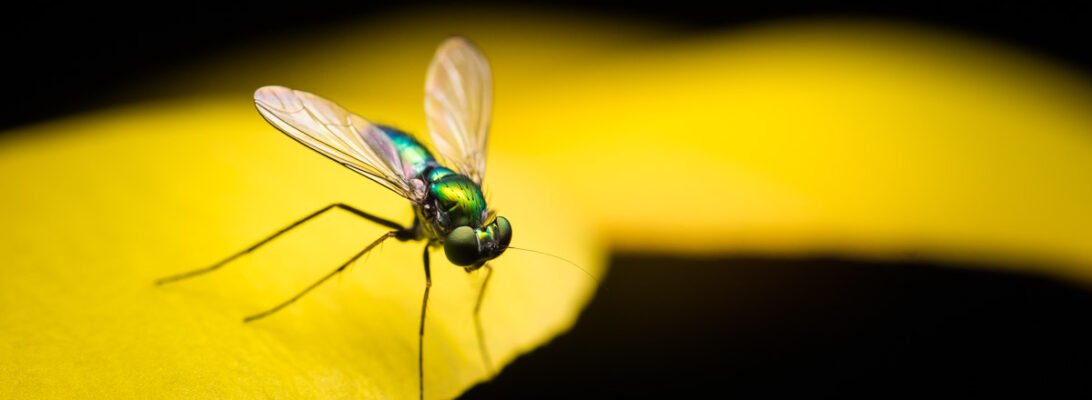
Fuji X Macro [Part 5]: Native 1:1 Macro Lens for Fuji (Zeiss)
It has been 2 and a half years since my last post about Fuji X macro photography. My last post was part 4 of the series titled “Fujifilm Extension Tube MCEX-11 & MCEX-16“. A lot has happened since then. During this time, I migrated back from Malaysia to the UK and it took a while to settle down. Life was so busy I hardly had time do to photography, let alone writing a blog post. Now that everything is settled down and I am starting to devote more time to this blog.
A lot has also happened in the photography world since then. In 2016, the Zeiss 50mm macro was the only Fuji X mount lens which offers 1:1 magnification. Now we have the fantastic 80mm macro and also some 3rd party options.
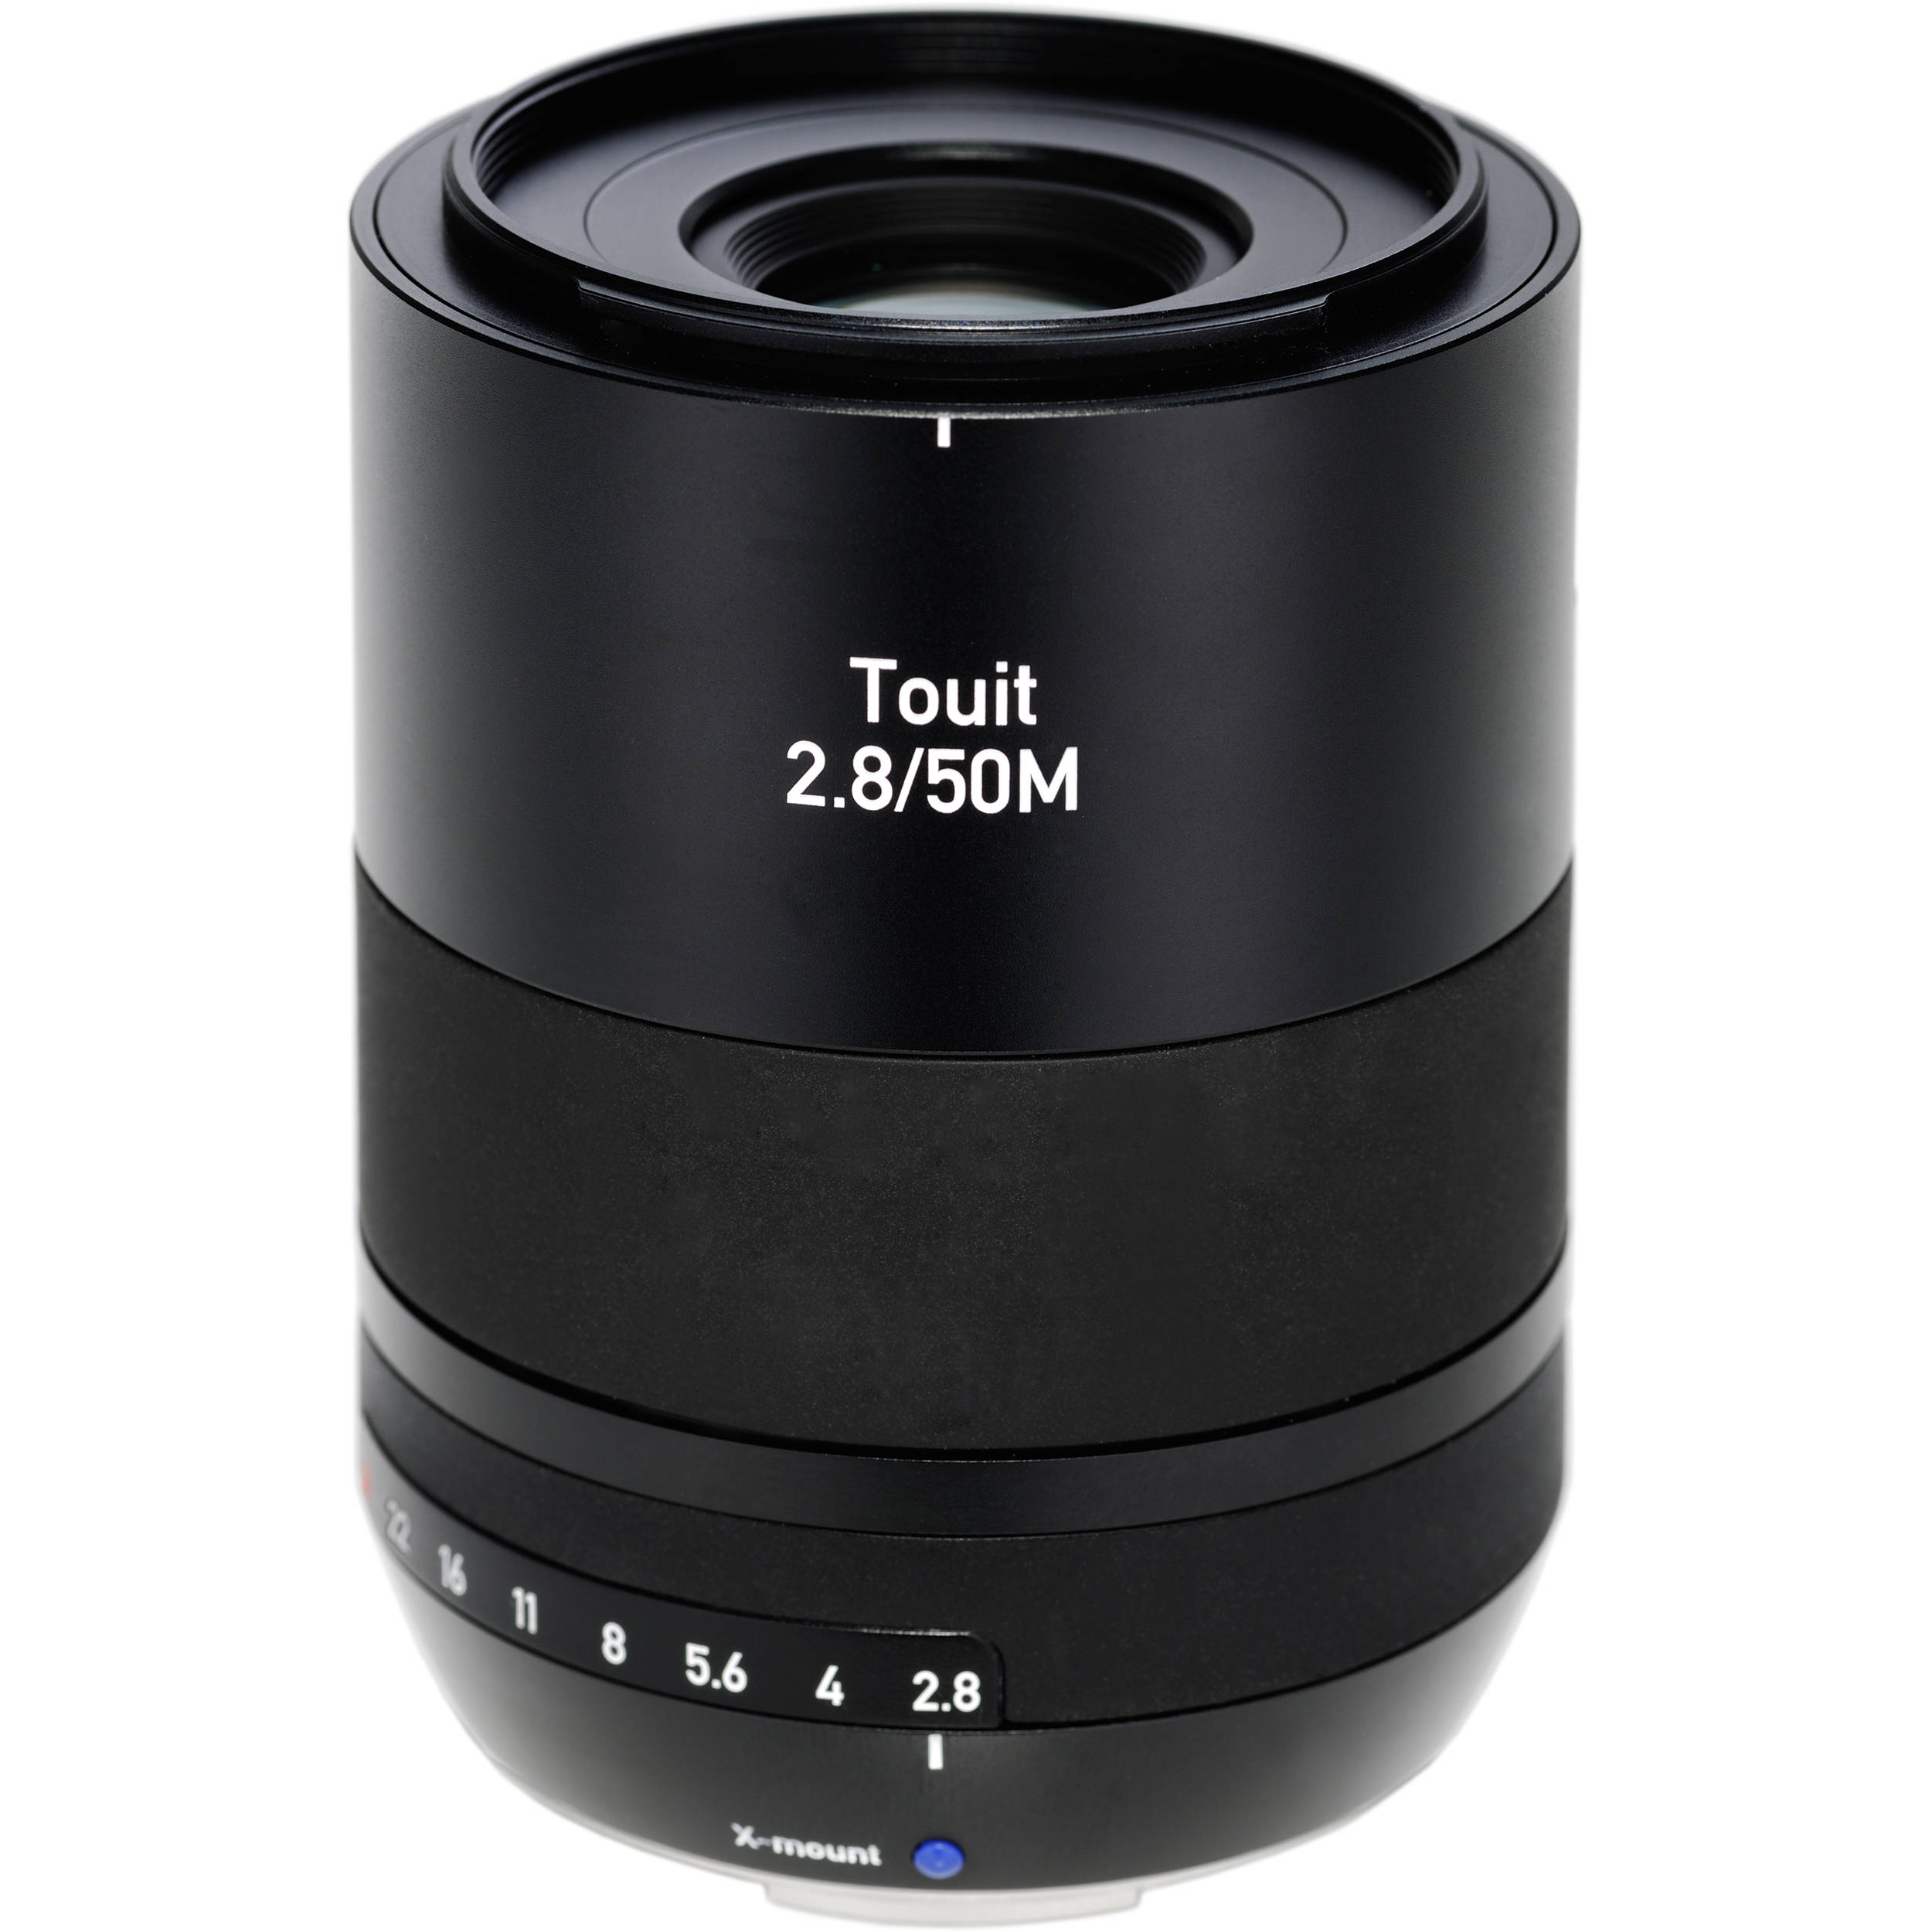
With that said, the Zeiss 50mm macro remains one of the best Fuji X mount lenses. It is small and lightweight and the image quality is exceptional. If you don’t need OIS and the reach of the 80mm, the Zeiss is the best option for you. Unlike the 60mm, it is internal focusing and also focuses faster. I used it for months, sold it before I moved to the UK and the bought it back again this year. I really missed it when I didn’t have it.
Here are some photos taken with the lens.
Non macro photos:


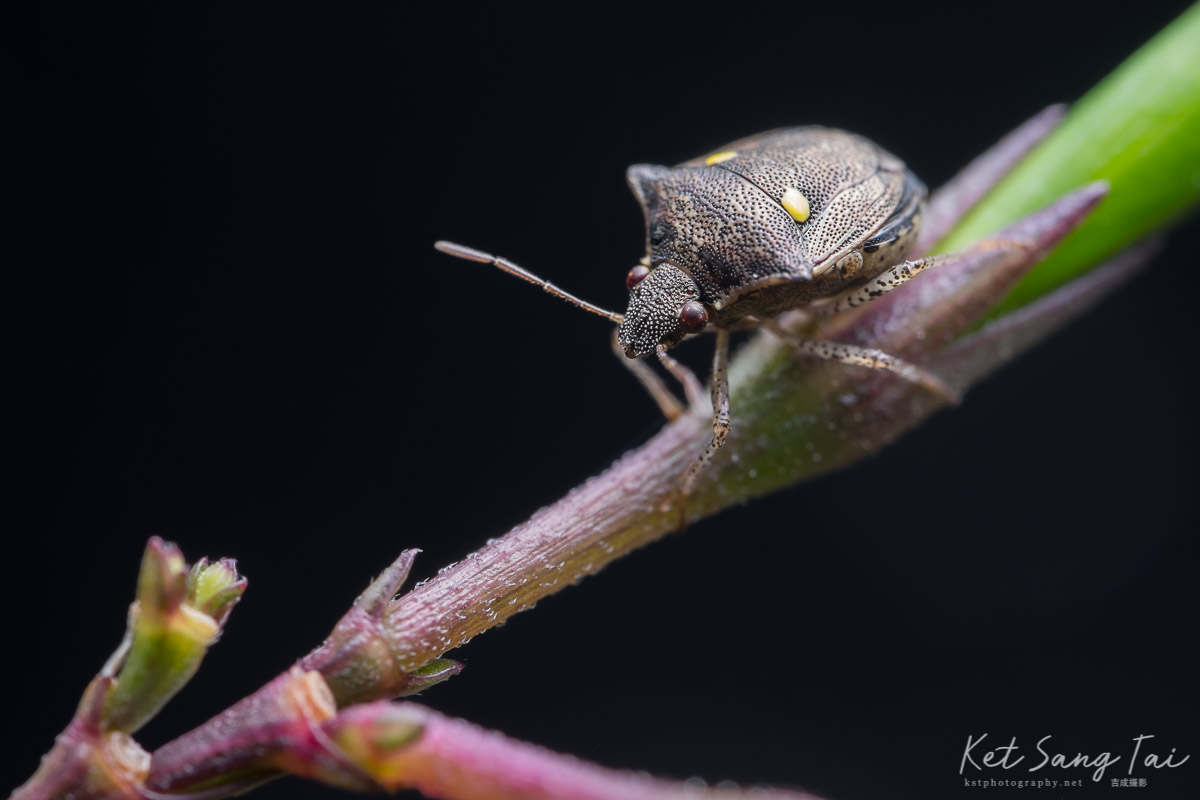
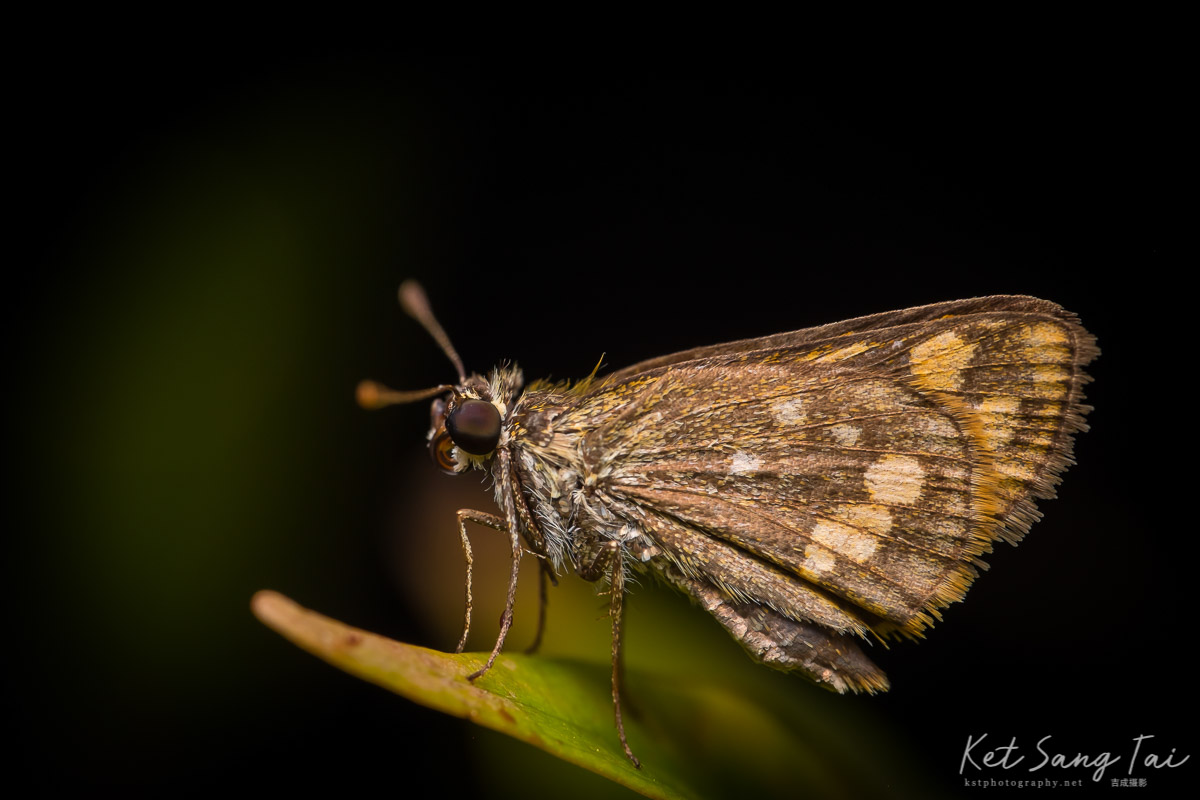
Macro photos:


Now that Fuji is a well developed and popular system, there is probably no need for me to write about other 1:1 macro lenses as these would have been well covered by other photographers, bloggers, and YouTubers.
Thanks for following this series and I hope you learned something useful.
Please check out the other posts in my Fuji X Macro series:
Part 1: x100s + Raynox-250
Part 2: Fujinon 60mm f2.4 with or without Raynox-250
Part 3: Adapted Macro Lens
Part 4: Fujifilm Extension Tube MCEX-11 & MCEX-16
Part 5: Native 1:1 Macro Lens for Fuji (Zeiss)
Poppies 2019
I can’t believe after living in the UK for nearly 15 years, I have not been to a poppy field. Officially a type of weed, Poppy has a very important symbolic function. To keen photographers, a big field of blossoming poppies is like a heaven.
This year I have decided to take a few hours off my busy schedule to hunt for a poppy field near where I live. I first went to a location suggested by a friend but to my disappointment, there were only a few flowers there. I then blindly drove around the area and to my great delight, I found a big field near Kidderminster.

At the time, the sun was almost gone and I had around 30 mins of sunlight left. It was also very windy which made using a small aperture for a larger depth of field impossible. I didn’t even get to use the tripod I brought with me. With a 28mm lens, I was able to quickly grab a few handheld shots before the sun fully set.

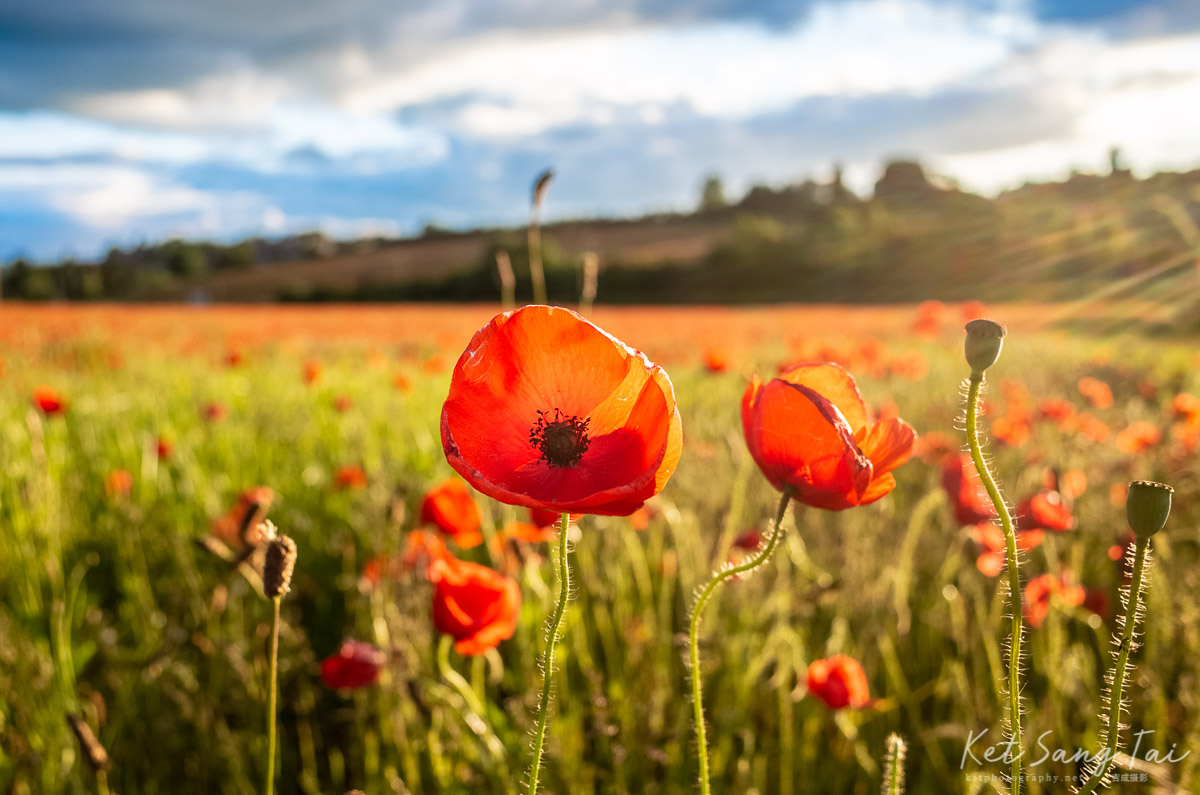
As poppy blossom only lasts for a few weeks, and it has been raining heavily for 1-2 weeks since I took those picture and it is forecasted to rain further, I don’t think I have the opportunity to go back there again this year. I am so glad I made the trip. I will definitely plan it better next summer.
Fuji X Macro [Part 4]: Fujifilm Extension Tube MCEX-11 & MCEX-16

When Fuji X system first came into existence, there is very little 3rd party support. With the XF 60mm macro lens only goes to 1:2 magnification and without any 3rd party macro lenses for the X-mount and good usable extension tubes (from Fuji or 3rd parties), the only ways to get to 1:1 magnification is by using close up filters like the Raynox or adapting lenses. I remember reading horror stories of people using poorly made extension tubes which damages their lens mounts and lenses.
So when Fujifilm announced their extension tubes MCEX-11 and MCEX-12 in 2014, it was indeed a fantastic news for Fuji X macro shooters. I owned both of these extension tubes and they are very well built and fit nicely to the the lens mount and the lenses.
You can achieve different magnification depending on which lens you use. Generally speaking extension tubes have greater effect on shorter lenses. Fujifilm has published a guidance chart as seen below. What fujifilm didn’t include in the chart is the effect of combination of both the MCEX-11 and MCEX-16 extension tubes. I often use both of them together to achieve greater than 1:1 magnification.

These extension tubes cost around $100 each. You can get cheaper 3rd party ones but my advice is to stick to Fuji ones. $100 sound like a lot for extension tubes but you get the best quality and it is much cheaper than a macro lens.
Here are some example photos.
XF35/2 with Extension Tubes:


XF56/1.2 with Extension Tubes:


Please check out the other posts in my Fuji X Macro series:
Part 1: x100s + Raynox-250
Part 2: Fujinon 60mm f2.4 with or without Raynox-250
Part 3: Adapted Macro Lens
Part 4: Fujifilm Extension Tube MCEX-11 & MCEX-16
Part 5: Native 1:1 Macro Lens for Fuji (Zeiss)